 I have just completed my DIY diamond tufted headboard and it looks great! Following is a tutorial and recount of my emotional journey 😉 that lead to the creation of a tufted headboard that is a fraction of the price of a bought one. I won’t lie, this has been my most challenging DIY yet. Don’t be fooled by the feminine curves of the tufting or the inviting soft plumps of foam, this project was a bitch! That said, it was so worth it!! I’m so relieved that it turned out well and my button to button method (explained below) worked beautifully for a beginner at upholstery. I challenge you to give this a go! It’s so rewarding. Anyway, here we go –
You will need –
Pegboard cut to size. The measurements will depend on what style and size you need.
3inch foam the same size as the pegboard
Batting – the same size as the pegboard with an additional 6inches all the way around
Fabric – same amount as the batting
Extra fabric for buttons
Upholstery thread – NOT regular cotton (trust me it won’t work)
Button making supplies – I needed 51
Staple gun
Buttons for backing – 51
Upholstery needle Step 1 – mark out where you want the tufts to be on the pegboard by circling around the holes. My tufts were about 6inches apart but you may prefer to have them closer or further apart depending on the look you want to achieve. Start marking the holes in the centre of the board so that the tufts are symmetrical. I drew up the pattern of diamonds when I was finished so that I could see they were all positioned correctly.
 Step 2 – lie the pegboard on the foam and using a sharpie draw through the holes to mark the pattern onto the foam. You should be able to see the marks clearly on the foam.
 Step 3 – using an old knife cut out a square section of foam where marked. Don’t be scared to cut out a decent amount of foam as this will make the tufting process easier and make sure the hole goes all the way through. This is the secret to nice deep tufts.
  Step 4 – layer up your headboard : pegboard, foam, batting and then fabric. Make sure the marked side of the pegboard is facing out at the back (so you can see where the tufts will be) and that the batting and fabric are nice and smooth with no bubbles.
  Step 5 – using the extra fabric make enough buttons to complete your tufts. This process takes and while, so be patient. Warning – your thumbs will be sore….very sore.
 Step 6 – let the tufting begin!! I’ve seen some tutorials where a staple gun is used to secure the upholstery thread in place. I tried it and I didn’t like it….at all. I found it difficult and really messy looking, so I tried a new method using some old buttons. I’m calling it the ‘button to button’ method. The pretty fabric covered button is on display at the front and any old four hole button secures the tuft at the back. Thread your upholstery needle, double it over and tie the ends in a knot. Thread the needle through the four hole button and then through the middle of the two threads. I went around a few times for added strength.
 Step 7 – start at the top in the centre and work your way out to the edges. Insert the needle through the marked hole at the back and out the front through the foam, batting and fabric. Pull your thread tight so the button at the back is over the hole. At the front, ease the fabric into a point and then attached your fabric button.
  Step 8 – Take the needle back though the foam and pegboard. Don’t go through the exact same position or your fabric might tear. I tried to leave about 1/2 cm between the exit and entry point. Sounds easy right! Wrong. 😦 sometimes the needle went straight through and out the exact hole and other times it took an eternity to find the right route back through the foam. Patience is the key. I was pretty patient, surprisingly patient (especially given I was premenstrual) up until the last couple of rows. Then the cursing started….and it didn’t stop until the last button. Thank goodness the kids were at school. 🙂
 Step 9 – Alright, once your needle is back out through the same hole it entered it’s time to secure your tuft. Apply pressure to your fabric button while pulling tight on the upholstery thread. Insert the needle under the thread in the button and knot tightly. I repeated this about three times for each button to make sure it was properly secure. Stand back and admire.
 Step 10 – Now repeat steps 6,7,8 and 9 about 51 times (it felt like about 1000 times). It’s agony….really. I must have stabbed myself a hundred times with the needle, the thread almost cut a slice out of my hand and all of my muscles ached from wresting with the foam and buttons. I totally underestimated how physical this task would be. When that last button was secured I’m pretty sure I heard a choir of angels singing and I may have cried a little. Post tufting euphoria! Cursing over. 🙂 Happy days!
  Step 11 – staple the fabric firmly over the pegboard making sure your corners are nice and tidy. Try to keep the tension the same all the way around. Trim off the excess fabric and batting. I’m planning on covering the entire back surface with a piece of felt or fleece to stop the buttons rubbing on the wall once it’s hung.
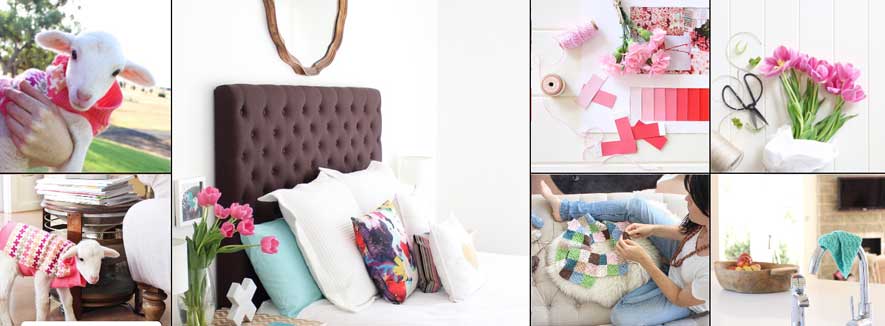
  Here are a couple of shots in my room at home. The headboard will go to the guesthouse next week and I’ll be sure to post some pics of it at it’s new home. I’m convinced now that I want to make one for my bedroom at home, but I’m going to wait about 6 months, maybe have some counselling and physiotherapy before I started the next one. 🙂


my goodness there is no stopping you! It looks amazing!
LikeLike
Thanks Jill. I’m so happy with how it looks! Totally worth the pain.
LikeLike
Very impressed. Looks so professional. I have a bed a little like this – check out my Instagram – but I bought mine! Hope you are rewarding yourself for your top DIY work
LikeLike
Thank you so much for calling it professional! Much appreciated 🙂 I’m planning on rewarding myself with wine tomorrow night.
LikeLike
Oh I fully support a wine reward!
LikeLike
Oh my, you sound like me when I’m doing a project. Why do they always end up being so much more labor intensive than we think they will be? Your headboard is fabulous though!! Well done! Now go have a glass of wine and let your body recover!!
LikeLike
Haha! Yes why is it always harder than we think it will be?? 🙂 thanks for your comment. 🙂
LikeLike
It looks amazing! I really want a tufted headboard, so I may have to give this a try some time!
LikeLike
Thanks Steph! Give it a try. It’s a lot cheaper than buying one 🙂
LikeLike
When are you taking orders! You are so clever, all looks amazing.
LikeLike
Haha! I’m not planning on taking orders Yvette. It’s all too hard. Xo
LikeLike
It looks fantastic, such a lot of work but totally and utterly worth it x Kylie
LikeLike
Thank you Kylie! The pain has passed and I’m already considering the next one 🙂 so much cheaper than buying one
LikeLike
It looks so good Mandy. I appreciated the photo on Instagram but to actually see the work behind it is just amazing. You are very patient! The one I saw today in the shop wasn’t anywhere as good as this – and the price was crazy. I just love a great DIY project! Robyn
LikeLike
Yay!! I love a great DIY project too, especially when it’s so cost effective. I was so happy with the result. 🙂
LikeLike
Pingback: DIY Headboard at RedAgape Guesthouse | RedAgape
Pingback: My home office and craft room tour | RedAgape
Oh my goodness you are genius! I love the double button method! I am thinking of tackling tufting for one of my boys rooms… i think i most definitely have to now! Im pinning your method as well xx
LikeLike
I’m sure all good upholsters use this method LOL. It really worked for me and the tufts haven’t moved all since completetion. Have a go! I’d love to see it when you’re finished. 🙂
LikeLike
I’m a little scared of the physical effort, but if I can jackhammer plaster off a 60 year old wall I should be able to tackle a bedhead eventually 😉
LikeLike
Haha! Im sure you can handle it. I’m just a sook 🙂
LikeLike
Thanks so much for this post! I worked tirelessly for two days trying to get my tufts tight but couldn’t and when I was on the verge of tossing my beast of a burden headboard out the window I came across your post and your explanation of “how to” secure the buttons on the backside to make the tufts tight was my breakthrough. Thanks again! You have made me a believer in my diy projects 🙂 and a follower of your blog!
LikeLike
Thanks so much for your comment Christy! i too, found getting the tufts tight a real challenge and i didn’t have much confidence in the techniques i’d seen elsewhere. My headboard is still looking great and none of the tufts have loosened at all. I’m glad i was able to help. i understand the frustration is starting a project and it not working out as you planned, so i’m super happy that you’ve been able to find a solution. yay!! 🙂
LikeLike
This is a great tutorial! Thanks so much for posting it! I’m planning on making this for my daughter’s room – a couple of questions. How did you finally attach it to the wall? How far above the mattress do you have it positioned? And lastly, how much was the overall cost of the headboard for you?
Thanks much!
LikeLike
hi Wendy! i attached to the wall a bit like a picture frame – two hooks in the back with strong rope threaded through and then hung over two hooks on the wall. I positioned mine just below the top mattress of the ensemble, as this helps to keep it in place. i cant remember the exact costs, but i think it was just under $200 and most of that was spent on good quality foam. I hope this helps. Enjoy your DIY. 🙂
LikeLike
Hi, I love the button to button method! So much neater and easier than the staple method. But I have a question: how exactly am I threading the fabric button through the back if the other button is right there blocking the hole?
I hope that is not a silly questions 😉
LikeLike
Hi Debbie, so sorry for my late reply. The answer isnt easy I’m afraid. It’s tricky to navigate your way back through the padding and through the pegboard….without the button in the way. 🙂 i push the button to the side until I’ve got the needle and thread through the pegboard – i then thread it through the button. I hope you’re project is going well. xx
LikeLike